How to make something ugly looking much better :)

Unfortunately, I didn't make a picture before I had my mad-scientist-moment-of-crafting, but TRUST me, this old cap was very ugly – because it's orange color started to get darker during years of standing on top of my washcloth box. Of course, that's normal – it's made out of plastics, but I just couldn't stand looking at it anymore! Especially because it snapped on a part. So I just took it, went onto my balcony, took a transparent primer… Waited for it to dry… Then I took my yellow acrylic spray paint, painted it, waited, then put another coat of yellow.
Later that day, after I was sure it was dry, I took my NEON PINK acrylic spray paint and tried a small ombre effect :)

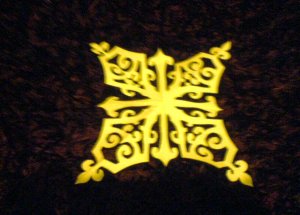
After everything was dry, I took my permanent marker, or – I am sure if I say “Sharpie” it would sound more familiar to you :). I just tried to draw something looking like paisley. :) And, VOILA! :)

Do you like how it looks? Aw, yes – the last thing I did was spraying some varnish onto the cap :)
P.S.: Sorry for the bad photos, I couldn't wait until tomorrow, I took a pic during night, so it's a bit darker than in nature. I hope you don't mind :)


In progress: a surprise

Slika

DIY stencil

This is officially it! My first DIY on blog! :)
So, to make a long story short – this is just me playing and figuring out if something interesting can be done out of improvising. :)

So, let's start.
I didn't make any pics of the first steps (because I didn't think about creating something – I just played a bit :)
But I am sure you will figure them out by yourselves.

What you need are scissors/exacto knife, a pen, some paper sheets or just paper as I took – and that's pretty much it!

As you can see, I took a usual A4 piece of paper, folded it in half – and then started folding it on one edge (always in the same direction, always the same side folding) to create something like a triangle.
Then I just draw something onto it, making sure the sides won't get cut out totally. Why?
Because if you don't take care of the cut, you will have many small stencils instead of a big one :)
Just try to imagine multiple copies of your drawing, because this is what the stencil is going to look like when you're finished!

Next step – cutting out following the lines of your drawing. I repeat, think twice before you cut out a part that should have stayed uncut. Here, the bottom side is connected in some parts.

Now you can see what was cut and what stayed connected. Well, you can just start having fun ;) – you can leave your pencil like this…

… or like this (hey, this even looks like a butterfly!) :)

OR – you can unfold the whole paper to see the final stencil :)

Here is another close up picture…

So, I hope you had some fun – thank you for following :)

P.S.: Next time I am sooooo going to use something different than a usual paper – it'll probably be a transparent paper sheet! Why?
I wish I had a Exacto knife! It was so hard without it – but unfortunately, you can't buy Exactos in my country, I can't figure out why. So I have to improvise, by taking a usual cutter.
And a Cameo? oh, it would be a dream come true! <3

I wish you all a nice crafting day :)

My First Post

First of all,
I want to thank you for visiting my blog :)

But, let me tell you more about the author of this blog (me :) ) …
I am from Bosnia and Herzegovina,
in real life a teacher – but in my secret life on the web :D,
I am a passionate bathroom singer, crafter, color addict who really loves the world beyond real life!

So, I hope you will enjoy surfing through my posts, pictures, ideas, thoughts, crafts, and whatsoever comes to my mind during a creation phase :)

Thank you for following!
Image

Herbanic Tinkture

100% Prirodni Preparati

Nemački, zašto da ne?!

Übung macht den Meister

mob.hr

/ Mobiteli, recenzije, usporedbe, testovi, vijesti, specifikacije, karakteristike, savjeti, cijene

Digitalizuj.Me

Crnogorska digitalna zajednica

TERRA ASTROLOGY

Astrology from a different perspective

Braunovic's By The Way Blog

Commedia dell' arte

Honestly WTF

Live, Love, Think, Write, Craft, Create

Zelena Soba

Moja vrata su uvek otvorena...